Dive into the intricate world of interfacing the Mpx5700dp pressure sensor with Arduino. The Mpx5700dp is a versatile sensor designed to measure differential pressure, ideal for various applications in engineering and electronics. By integrating it with an Arduino, hobbyists and professionals can develop reliable pressure monitoring systems. This article explores the practical aspects, techniques, and insights from industry experts.
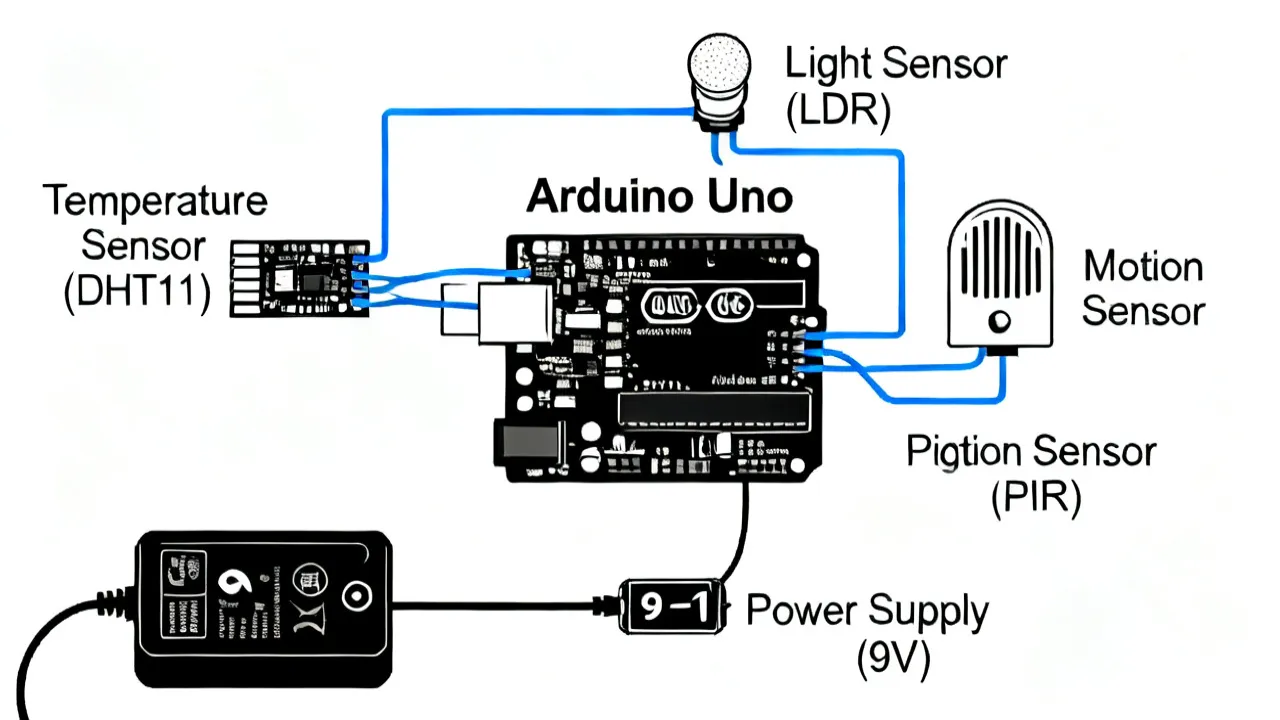
The Mpx5700dp is a popular differential pressure sensor widely utilized in engineering applications across various industries. When combined with an Arduino setup, the capabilities of this sensor are significantly enhanced, allowing for precise pressure measurements essential for projects ranging from simple prototypes to complex systems. This article explores the technicalities and practical applications of using the Mpx5700dp with Arduino.
The Mpx5700dp sensor is designed to measure differential pressure, making it ideal for applications such as HVAC systems, fluid level sensing, and airspeed measurement in drones. It operates by converting physical pressure into an electrical signal, which can be easily read by a microcontroller like Arduino. Its robustness and accuracy make it a preferred choice for both hobbyists and professionals.
To better understand its functionality, it's important to know that the Mpx5700dp sensor uses a piezoresistive technology. This means that the sensor's internal structure changes resistance when subjected to different pressure levels, allowing it to produce a corresponding voltage output. This output can then be analyzed to determine the pressure differential applied to the sensor.
Connecting the Mpx5700dp to an Arduino board requires understanding both the hardware setup and the coding aspects involved. The Arduino is a flexible microcontroller platform that simplifies the process of reading sensor data and sending it to a display or further processing it for analysis. Here's a guide to get started:
Once the hardware is ready, writing an Arduino sketch to read and process the sensor data becomes the next step. The code involves setting up the analog input for reading voltage values corresponding to the pressure levels. Here is a simple example:
#include <LiquidCrystal.h>
// Initialize the LCD with appropriate pins
LiquidCrystal lcd(12, 11, 5, 4, 3, 2);

void setup() {
  // Start serial communication for debugging purposes
  Serial.begin(9600);
  // Initialize the LCD
  lcd.begin(16, 2);
}

void loop() {
  int sensorValue = analogRead(A0); // Read the sensor output
  float voltage = sensorValue * (5.0 / 1023.0);
  float pressure = (voltage - 0.5) * 700.0 / 4.5; // Convert voltage to pressure
  // Output pressure information to the LCD and the serial monitor
  lcd.clear();
  lcd.print("Pressure: ");
  lcd.print(pressure);
  lcd.print(" kPa");
  Serial.print("Pressure: ");
  Serial.println(pressure);
  delay(500); // Pause for stability
}
Integrating the Mpx5700dp with Arduino offers numerous applications such as:
An expert from the field explains that the Mpx5700dp, with its straightforward integration with Arduino, serves as an excellent educational tool for demonstrating real-world pressure sensing technologies. Its practical applications and robust design make it invaluable for both learning and engineering development.
Furthermore, the adaptability of this sensor to various projects allows it to be used in both simple and highly complex systems. Educators have found it particularly beneficial in teaching students about sensors, data acquisition, and automation systems.
| Attribute | Description |
|---|---|
| Pressure Range | 0 to 700 kPa |
| Output Type | Analog Voltage |
| Accuracy | Highly accurate within specified range |
| Operating Temperature | -40 to +125 degrees Celsius |
| Response Time | Typically less than 5 milliseconds |
| Supply Voltage | 5 V DC |
The Arduino UNO is commonly used due to its versatility and sufficient number of analog inputs. However, any board with analog inputs will suffice for basic applications, including the Arduino Nano and Mega, which provide additional input capabilities.
The Mpx5700dp measures differential pressure and is designed to measure a range up to 700 kPa, suitable for the intended applications. However, it cannot indicate negative pressure unless the reference point is set to a certain baseline outside of its native characteristics.
Calibration involves ensuring the sensor’s output aligns with known pressure readings. This can be done using a standard reference pressure point and adjusting the offset in the Arduino sketch. It's essential to follow standard calibration procedures involving accurate pressure sources for the best results.
The Mpx5700dp can effectively handle a maximum differential pressure of 700 kPa, which allows it to be used in various industrial applications where such levels may be encountered. Exceeding this limit may damage the sensor or lead to inaccurate readings.
Yes, there are several alternatives to the Mpx5700dp, such as the BMP180 and BMP280 sensors for barometric pressure or other differential pressure sensors like the Honeywell ASDX series. The choice depends on the specific application requirements such as pressure range, accuracy, and form factor.
Utilizing the Mpx5700dp sensor with an Arduino not only equips users with precise pressure sensing capabilities but also offers a broad spectrum of applications in practical and educational settings. By understanding the intricacies of their interfacing, users can maximize the potential of this technology in varied environments.
Moreover, the combination of Arduino with the Mpx5700dp opens doors to innovation across fields, enabling creators, engineers, and students to explore and develop new projects that were previously hard to achieve. As technology advances, the integration possibilities and applications of this sensor will only continue to expand, making it a valuable asset in both commercial and educational spheres.
If you’re interested in learning more about the Mpx5700dp or improving your Arduino projects, consider exploring the following resources:
By leveraging the collaborative nature of online platforms and communities, you can not only enhance your understanding of the Mpx5700dp sensor but also find inspiration for new and innovative projects. Engaging with fellow enthusiasts can also significantly enhance your learning experience and open pathways for future endeavors.
In conclusion, whether you're a hobbyist seeking to create a unique project or a professional in need of reliable pressure measurement technology, the integration of Mpx5700dp with Arduino provides an effective solution. As you embark on your projects, remember the versatility and potential this sensor brings, and experiment with various applications to broaden your learning curve and innovative capabilities.
Striking the Perfect Balance: Navigating Premiums and Out-of-Pocket Expenses in Senior Insurance Plans

Explore the Tranquil Bliss of Idyllic Rural Retreats

How to Make Lasting Memories at Disneyland Attractions

Affordable Phones and Plans for Seniors

Affordable Full Mouth Dental Implants Near You

Unlock the Top Kept Secrets to Finding Your Ideal Dentist for Flawless Dental Implant Results!

Discovering Springdale Estates

Unveiling RS Sul Telecom Services

The Guide to Car Trading

Unveiling RS Sul Telecom Services
RS Sul Telecom emerges as a prominent entity in the telecommunications industry, providing reliable services across various regions. This article delves into the offerings of RS Sul Telecom, the benefits it presents to both individual and business clients, and its impact on the modern telecom landscape.

Understanding Rlock Advpl in Business
Rlock Advpl represents a pivotal advancement in business software solutions, offering enhanced security and efficiency for enterprise resource planning systems. This article delves into the intricacies of Rlock Advpl, its application in modern businesses, and the benefits it offers in streamlining operations and safeguarding data. As an expert tool, Rlock Advpl is essential for businesses looking to optimize their IT infrastructure.

Unveiling Atranet Innovation
Atranet represents a cutting-edge concept in networking technology. Harnessing its capabilities can transform digital communication by providing seamless connectivity. Designed to optimize data transfer, security, and efficiency, Atranet is shaping the future of how we connect and share information. This article delves into its structure, applications, and potential impacts on industry practices and consumer experiences.

Understanding Polysulfide Adhesive Applications
This comprehensive guide explores the applications and benefits of polysulfide adhesive, highlighting its unique properties and widespread use in construction, aerospace, and automotive industries. Known for its flexibility and resistance to various environmental factors, polysulfide adhesive is a key component in sealing and bonding applications, providing durability and reliability in demanding conditions.
Comparing Vtex with Salesforce Commerce
This article provides an in-depth comparison between Vtex and Salesforce Commerce, two leading digital commerce platforms. Each offers unique features suited to different business needs. Vtex is renowned for its collaborative commerce approach, while Salesforce Commerce shines with its comprehensive customer relationship management capabilities. Explore their differences, strengths, and insights from industry experts.

Understanding the Latest Chrome Version
This article delves into the intricacies and features of the latest Chrome version. Chrome, developed by Google, is one of the very popular web browsers globally, known for its speed, simplicity, and security features. Each update aims to enhance user experience through improved functionality and performance. Understanding these updates is crucial for both everyday users and developers.