This guide explains how to evaluate and use the Extech EX900 clamp meter for electrical troubleshooting, maintenance, and measurement work. The instrument is generally associated with clamp-based current measurement and a broad set of multimeter functions, but specifications, included accessories, and operating limits should be confirmed in the latest manufacturer documentation. The article covers measurement principles, safety, setup, applications, maintenance, purchasing considerations, and common questions.
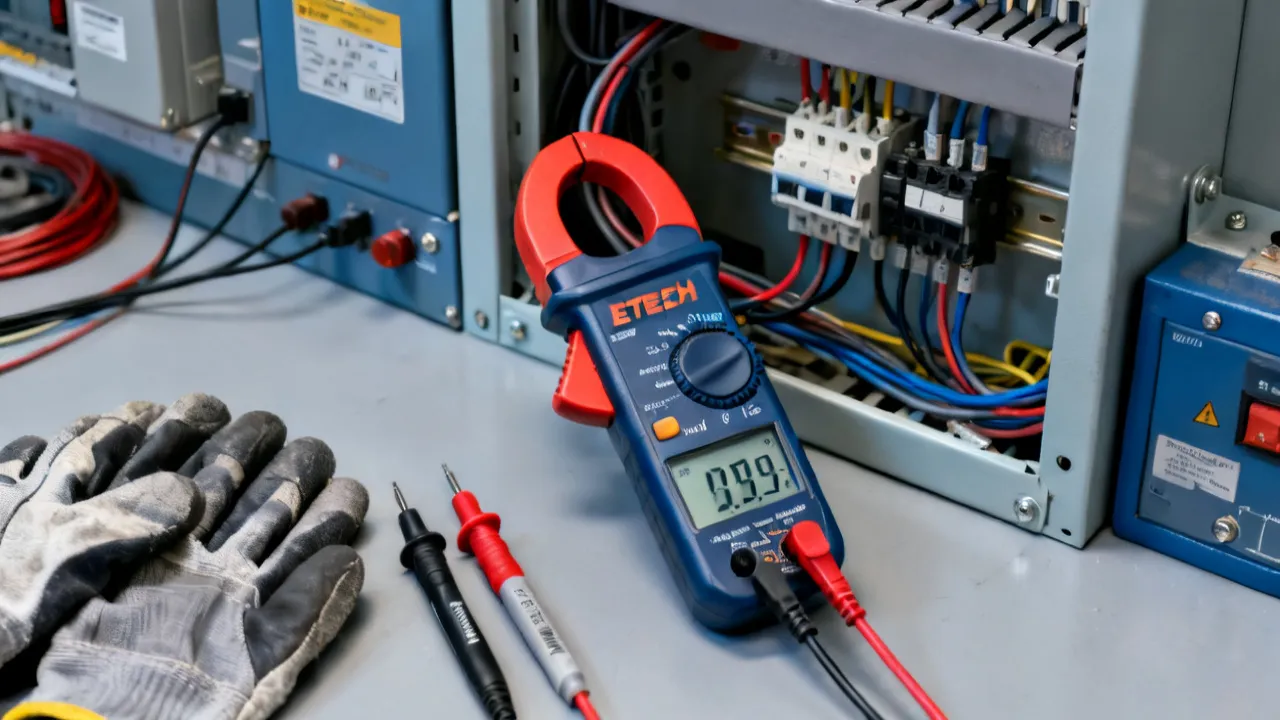
The Extech EX900 is a professional-oriented clamp meter designed to help technicians measure electrical current without disconnecting a conductor. That central capability makes a clamp meter particularly useful in maintenance environments, where opening a circuit can increase downtime, introduce connection errors, or create unnecessary exposure to energized components. The EX900 is also commonly discussed as a multifunction test instrument, combining current measurement with several conventional digital multimeter functions.
For an electrician, facilities engineer, HVAC technician, or industrial maintenance specialist, the important question is not simply whether the Extech EX900 has a long list of functions. The more useful question is whether its measurement range, jaw capacity, display behavior, input protection, accuracy, and operating procedure fit the work being performed. A meter can be highly capable on paper and still be unsuitable for a particular installation if the conductor is too large, the environment is too hazardous, or the expected signal falls outside its measurement category.
Product descriptions and regional listings may present different wording for the EX900, including variations in accessory packages or published specifications. Buyers should therefore compare the exact model designation, revision, documentation, warranty terms, and supplied probes before placing an order. The manufacturer’s current manual and technical data should remain the final authority for limits and operating procedures.
Use the Extech EX900 as a measurement tool, not as a substitute for electrical risk assessment. Confirm the circuit category, expected voltage and current, conductor position, test-lead condition, and measurement mode before taking a reading.
A conventional multimeter measures current by becoming part of the circuit. In practical terms, the circuit must be opened and the meter inserted in series. A clamp meter approaches the task differently. Its hinged jaw surrounds a single conductor and detects the magnetic field associated with current flow. This allows the technician to estimate or measure current while the conductor remains connected.
This distinction is especially valuable when examining motors, distribution equipment, branch circuits, compressors, pumps, lighting systems, and control cabinets. A technician can observe operating current without removing a terminal or interrupting a load. The approach is faster and, when applied correctly, can reduce unnecessary intervention in the circuit.
However, clamp measurement is not automatically accurate in every situation. The jaw generally needs to surround one conductor rather than an entire cable containing both outgoing and returning conductors. When both conductors are enclosed, their magnetic fields may partially or largely cancel, producing a misleading result. This is one of the most important operating principles for anyone using the Extech EX900.
Current flowing through a single conductor creates a magnetic field that the clamp sensor can detect. If the supply and return paths are enclosed together, the opposing fields can cancel. The display may then show a low value even though the equipment is drawing substantial current. If a bundled cable cannot be separated, a clamp reading may not be suitable without an approved measurement accessory or a different test method.
The conductor should also be positioned as centrally as practical inside the jaw. The design of a clamp sensor assumes a defined magnetic geometry. Placing the conductor near the edge can affect repeatability, particularly when measuring low currents or when nearby conductors produce interfering magnetic fields.
Magnetic interference can also come from adjacent high-current conductors, transformers, contactors, busbars, and other energized equipment. In a crowded panel, a small displayed value should not automatically be interpreted as proof that the circuit is carrying little current. Repositioning the clamp, taking a second reading at another accessible point, and comparing the result with expected load data can help identify a measurement problem.
The Extech EX900 is generally presented as a multifunction clamp meter rather than a current-only instrument. Depending on the specific version and the documentation supplied with the unit, users may encounter functions such as AC or DC current measurement, AC or DC voltage measurement, resistance, continuity, diode testing, capacitance, frequency, duty cycle, and temperature. Some product descriptions may also mention non-contact voltage detection or related convenience features.
Because product configurations can change by market or production revision, the function selector and display symbols should be checked against the instrument’s manual. The following overview explains why each function matters without treating every possible feature as guaranteed for every package.
| Measurement area | Professional use | Important consideration |
|---|---|---|
| Clamp current | Checking load current in a conductor without opening the circuit | Confirm whether the selected mode is intended for AC, DC, or both, and keep one conductor inside the jaw |
| Voltage | Verifying supply potential, control voltage, and circuit presence | Use the correct input terminals, range, and measurement category for the installation |
| Resistance | Assessing continuity of de-energized wiring and components | Isolate power and discharge capacitors before connecting the meter |
| Continuity | Quickly identifying a low-resistance path | The audible threshold is a convenience indication, not a full circuit diagnosis |
| Diode testing | Checking semiconductor junction behavior | Remove parallel paths where possible and follow the component manufacturer’s procedure |
| Capacitance | Evaluating capacitors in selected maintenance tasks | Isolate and discharge the capacitor using an approved method before testing |
| Frequency or duty cycle | Examining periodic electrical signals and control outputs | Signal shape, amplitude, and input limits affect the reliability of the reading |
| Temperature | Checking equipment or process temperature when the correct probe is available | Verify probe compatibility, insulation, temperature range, and surface-contact method |
This table is a practical framework rather than a replacement for the product manual. The exact range limits, resolution, accuracy, response behavior, and accessory requirements should be taken from the official documentation for the unit being used.
Voltage measurement is often the first step in diagnosing a circuit. The Extech EX900 may be used to check whether a supply is present, compare line-to-line and line-to-neutral values, verify a control transformer output, or investigate a low-voltage control circuit. The technician must establish the correct reference points before connecting the probes. A voltage value is meaningful only in relation to the points between which it was measured.
Voltage testing can also reveal an open neutral, a missing phase, a blown fuse, a defective contactor, or an unexpected potential on a supposedly inactive conductor. Nevertheless, a voltage indication should be interpreted carefully. A high-impedance meter can display “ghost voltage” caused by capacitive coupling on an otherwise disconnected conductor. A suitable proving method or a low-impedance test instrument may be needed when distinguishing an energized conductor from a coupled or induced voltage.
Resistance and continuity functions are useful for de-energized wiring, switches, fuses, relays, coils, and selected passive components. Continuity mode provides a quick indication that the resistance between two points is below the instrument’s audible threshold. It does not prove that a connection can carry its intended load current, nor does it prove that a wire is free from intermittent faults.
A conductor can pass a continuity test and still have a loose terminal, corrosion, excessive resistance under load, or an intermittent break caused by vibration. For that reason, continuity should be considered an initial screening test rather than a complete assessment of circuit integrity.
Capacitance measurement may assist with selected maintenance tasks, including checking a motor-run capacitor or examining a removed electronic component. Capacitors must be isolated and discharged through an approved method before testing. A capacitor can retain dangerous energy even after equipment has been switched off. The technician should not assume that touching the probes or selecting the capacitance function will safely discharge it.
Diode testing applies a controlled test signal to a semiconductor junction and observes the resulting forward voltage or related response. Parallel components, connected circuit paths, and in-circuit biasing can produce confusing results. When accuracy matters, remove or isolate the component according to the equipment manufacturer’s service instructions.
AC and DC current are not interchangeable measurement tasks. Alternating current changes direction periodically, while direct current maintains a substantially constant direction under normal conditions. A clamp meter must use the appropriate sensing method and selected mode for the signal under examination.
AC current measurement is common in building services, motor circuits, distribution systems, compressors, and general load checks. DC current measurement is relevant to battery systems, photovoltaic installations, vehicle electrical systems, control circuits, and selected industrial power supplies. If a meter supports both, the user must select the correct function before interpreting the display.
Some loads do not produce a clean sine wave. Variable-frequency drives, switched-mode power supplies, electronic lighting, battery chargers, and modern control equipment can create distorted waveforms. A true-RMS instrument is often preferred for such applications because it is designed to provide a more meaningful heating-equivalent value for many non-sinusoidal signals. Even so, true-RMS capability does not make every waveform measurement automatically accurate. Frequency range, crest factor, bandwidth, and manufacturer-defined conditions remain relevant.
Motors, transformers, compressors, and capacitive power supplies may draw a short-duration current surge during startup. A normal displayed operating value may not reveal this event. If the Extech EX900 version in use provides a suitable inrush or peak-related function, it may assist with troubleshooting, subject to the manual’s timing and range limitations.
Inrush measurements should be planned carefully. The technician should first establish the normal operating conditions, identify the expected load behavior, and ensure that the meter is appropriate for the circuit. A high starting current is not automatically a fault; it must be compared with equipment documentation and the behavior of a known-good system.
When measuring inrush, the position of the clamp should remain stable before the equipment is energized or commanded to start. Moving the jaw during the event can introduce mechanical and measurement error. It is also useful to document whether the motor started unloaded, partially loaded, or under its normal process load, because those conditions can substantially alter the current profile.
Electrical safety cannot be inferred from a product photograph or a sales description. Measurement category markings, maximum voltage ratings, fuse specifications, probe insulation, and enclosure design all contribute to safe use. Common installation categories include CAT II, CAT III, and CAT IV, with higher categories generally relating to more demanding portions of an electrical installation. The correct category depends on where the measurement is made, not merely on the nominal voltage.
For example, a measurement at a receptacle may have different transient exposure from a measurement at a distribution board or service entrance. A meter appropriate for a protected electronic circuit may not be appropriate for an industrial feeder. The user must read the markings on the instrument and leads and compare them with the installation environment.
Many incidents occur because a meter remains configured for current while the user attempts to measure voltage. Good work practice includes a deliberate “test-before-touch” process, verification of the meter on a known source where appropriate, measurement of the target circuit, and re-verification of the instrument afterward. Local regulations and employer procedures may impose additional requirements.
The correct PPE depends on the system, task, available fault current, work method, and local safety rules. Gloves, eye protection, flame-resistant clothing, hearing protection, and insulated tools may be required in particular environments. PPE does not make an unsafe procedure safe; it is one layer in a broader hierarchy of controls.
The technician should avoid reaching across energized components, working from an unstable position, or placing the body directly in front of equipment where an arc event could occur. If the panel must remain open, barriers and an established approach procedure should be used. When the task can be performed de-energized, isolation and verification are generally preferable to live testing.
Before touching the equipment, identify what needs to be learned. Are you checking whether a motor is energized, comparing phase currents, investigating a tripped protective device, verifying battery output, or testing a component on a de-energized board? A precise question leads to a safer and more useful measurement.
Determine the nominal voltage, expected current, conductor arrangement, source, load, and accessible test point. Establish whether the signal is AC, DC, or a waveform generated by electronic equipment. Check the equipment label and schematic when available. Do not rely on color coding alone.
Examine the Extech EX900 for physical damage. Check the jaw surfaces for dirt or obstruction, confirm that the hinge closes correctly, and inspect leads for worn insulation or exposed conductors. Confirm battery condition if the display indicates a low-power warning or if readings behave inconsistently.
Set the instrument to the intended voltage, current, resistance, temperature, or other mode. If the model offers automatic ranging, allow the instrument to settle before judging the value. If manual ranging is used, select a range that accommodates the expected measurement. Pay attention to AC and DC symbols, polarity indicators, unit symbols, and overload warnings.
Open the jaw and place it around one conductor. Close the jaw fully and ensure that no insulation or mechanical obstruction prevents a proper closure. Keep the conductor near the center where practical. Do not clamp around a multi-conductor cable when the individual current paths are expected to cancel.
Electrical systems change with load demand. Wait for the display to settle, particularly when a motor starts, a compressor cycles, or a control system changes state. Record the operating condition along with the reading. A current value without context is difficult to interpret.
On a balanced multiphase system, comparing corresponding phase currents can reveal useful differences. On a single-phase installation, compare the observed value with the equipment nameplate, design documentation, or a known operating baseline. A difference does not automatically identify the cause; it indicates that further investigation may be warranted.
Open the jaw only after confirming that it is safe to withdraw the meter. When changing from current measurement to a lead-based function, remove the leads if necessary and place them in the correct terminals. Avoid carrying the instrument with exposed probes contacting unknown surfaces.
Motor current can help technicians identify operating imbalance, overload conditions, phase issues, mechanical loading, or abnormal startup behavior. The Extech EX900 can be useful for an initial assessment when the meter’s current capability matches the motor circuit and the measurement is made in accordance with site safety procedures.
Current alone does not prove that a motor is healthy. A motor may draw an apparently normal current while suffering from insulation deterioration, bearing wear, misalignment, cooling problems, or intermittent control faults. Good diagnosis combines current observations with voltage checks, temperature, vibration, mechanical inspection, protective-device history, and manufacturer guidance.
When comparing phases, measurements should be taken as close together in time as practical. A process load may change while the technician moves from one conductor to another. Differences should be interpreted alongside line voltage, motor loading, connection condition, and the motor’s rated current. If one phase is significantly different, the possible causes may include supply imbalance, a loose connection, a winding issue, or a load-related mechanical problem.
Compressors, condenser fans, evaporator fans, pumps, and heating elements each have distinct electrical behavior. Current measurement can help verify whether a component is operating and whether its load is broadly consistent with expectations. Temperature measurement, when supported by the appropriate probe, may add context during service work.
Technicians should remember that refrigerant-system diagnosis cannot be completed by electrical measurements alone. Pressure, airflow, ambient conditions, control settings, and equipment design all affect the interpretation. A clamp meter is one part of a wider service process.
In HVAC applications, equipment may cycle between several operating states. A reading taken during a defrost cycle, compressor delay, fan-only operation, or auxiliary heat sequence may look abnormal if the technician does not know which state is active. The measurement record should therefore include the operating mode and relevant thermostat or controller settings.
Facilities teams can use clamp measurements during preventive maintenance to establish operating baselines for pumps, air-handling equipment, lighting circuits, and distribution panels. Repeated measurements taken under comparable conditions may reveal changes over time. The value of a baseline depends on consistent documentation: date, equipment state, ambient conditions, circuit identification, and instrument used should be recorded.
Trend monitoring is especially useful for rotating equipment. A gradual increase in current may correspond with mechanical wear, a blocked filter, increased process demand, or a change in control settings. It is not proof of one specific fault, but it can provide an early prompt for further inspection.
DC clamp measurement can be useful in selected battery, charging, and photovoltaic applications. Correct polarity and conductor selection are essential. Some DC systems contain large stored energy even when the measured voltage appears modest. Arc-flash, short-circuit, and battery-specific hazards must be addressed independently of the meter’s measurement function.
Solar and battery systems can also have multiple current paths, parallel strings, charge controllers, and bidirectional power flow. The technician should identify whether the measurement is intended to show charging current, discharging current, array current, or inverter input current. A negative sign or unexpected direction may reflect polarity or actual reverse flow, depending on the selected mode and instrument behavior.
Voltage, continuity, resistance, frequency, and duty-cycle functions can support troubleshooting in control systems. Yet electronic circuits often have low signal levels, high impedance, switching waveforms, or sensitive components. The meter must be connected only to points that are suitable for the selected function and input protection level.
Control circuits may also be referenced to floating supplies, isolated outputs, or programmable devices. Measuring between the wrong reference points can produce a plausible but irrelevant value. Schematics and terminal designations should be reviewed before probing unfamiliar equipment.
A technically correct procedure can still produce an unreliable result if the measurement environment is overlooked. The following issues are common when using any clamp meter, including the Extech EX900.
| Observed issue | Likely contributing factor | Recommended response |
|---|---|---|
| Unexpectedly low clamp current | Both outgoing and returning conductors are inside the jaw | Separate the conductors if the installation and safety procedure permit it |
| Unstable low-current reading | Electrical noise, nearby conductors, poor jaw closure, or a signal near the instrument’s resolution limit | Improve conductor position, close the jaw fully, repeat the reading, and compare with another approved method |
| Voltage reading differs from expectation | Wrong mode, incorrect terminals, reference-point error, or a high-impedance circuit | Review the schematic, leads, range, and measurement category before repeating |
| Resistance value appears too low | Parallel circuit paths, connected components, or residual stored energy | Isolate the component and discharge the circuit using the approved procedure |
| Reading changes with equipment operation | Variable load, cycling control, motor starting, or waveform change | Record the operating state and use a suitable capture or logging method if available |
| Display shows overload or an unexpected symbol | Measurement exceeds the selected range or function limits | Stop, reassess the circuit, and consult the manual before selecting another range |
Automatic ranging is convenient, but it may take time to settle when a signal is unstable or when the circuit transitions between states. Manual ranging can be useful when a stable measurement must be observed repeatedly, provided the selected range is suitable. If the display indicates overload, do not continue probing while assuming the value is only slightly above the selected range. Stop and reassess the circuit and meter limits.
Low-current measurements require particular care. A clamp sensor is generally less sensitive at the bottom of its range than at moderate or high current. The result may be affected by magnetic noise, conductor position, zero offset, or nearby wiring. If the decision depends on a very small current, consider whether a specialized low-current clamp, a current probe, or another approved test method is more appropriate.
Accuracy describes how close a reading may be to a reference value under specified conditions. Resolution describes the smallest displayed increment. Repeatability describes how consistently the instrument produces a result when the same measurement is repeated under comparable conditions. These terms should not be treated as interchangeable.
For example, a display that shows several decimal places may appear precise while the actual accuracy is limited by the selected range, temperature, waveform, or sensor behavior. Conversely, a coarse display may still be adequate for confirming whether a load is operating within a broad engineering limit. The professional user chooses the instrument and range according to the decision that must be made.
When comparing the Extech EX900 with another clamp meter, examine the complete specification rather than focusing on the highest advertised number. Relevant points include AC and DC current ranges, voltage limits, frequency response, true-RMS behavior if specified, jaw opening, minimum measurable current, response time, input impedance, continuity response, temperature capability, safety category, environmental rating, and calibration support.
Accuracy specifications may be expressed as a percentage of reading plus a number of counts. The counts portion becomes more significant at the lower end of a range. Temperature and humidity can also influence results, especially when the instrument is moved from a cold vehicle into a warm, damp facility. Allowing equipment to acclimate and following the specified operating conditions can improve consistency.
Routine care improves reliability. Store the meter in a dry, protected location away from excessive heat, corrosive chemicals, strong magnetic fields, and physical impact. Keep the jaw surfaces clean and ensure that the hinge is not obstructed. Do not use solvents or cleaning products unless they are approved for the instrument’s housing.
Test leads deserve the same attention as the meter. Replace leads when insulation is damaged, probe tips are loose, or guards no longer provide adequate protection. Leads should be rated for the environment in which they are used, not merely for the nominal voltage printed on a circuit.
Battery replacement should follow the manufacturer’s instructions. Disconnect the instrument from every circuit before opening the battery compartment. Dispose of batteries according to local requirements. If the display becomes faint, readings become erratic, or the instrument behaves unexpectedly, remove it from service until the cause is understood.
Calibration intervals should be based on the instrument’s risk, frequency of use, required confidence, environmental exposure, and organizational policy. A calibration label is not proof that a meter is safe to use if it has subsequently been dropped or electrically overstressed. After a severe event, inspection and verification may be necessary even when the calibration date has not expired.
Organizations that use several meters should maintain an equipment register. The register can identify the assigned user, serial number, calibration date, inspection status, accessories, and repair history. This is particularly useful when readings are used to support maintenance decisions, regulatory records, or warranty claims.
When sourcing an Extech EX900, compare authorized distribution channels, established test-equipment suppliers, and regional technical retailers. Product availability and pricing can vary according to market, tax, shipping, warranty, and package contents. Because a low listed price may exclude essential accessories or after-sales support, the purchase decision should consider total ownership rather than the headline figure alone.
Before ordering, confirm the following:
For professional teams, procurement should also consider training, spare leads, protective storage, asset tracking, and periodic verification. An inexpensive instrument that cannot be supported or correctly documented may create more operational difficulty than a slightly higher-cost unit from a dependable source.
Buyers should be cautious with listings that use generic photographs, omit the model label, combine specifications from multiple products, or promise accessories without identifying their ratings. If the meter will be used in a commercial or industrial environment, documentation and traceable support are usually more valuable than a small initial saving.
The Extech EX900 should be compared with alternatives according to application rather than brand recognition alone. A residential service technician may prioritize compact size and simple current checks. An industrial engineer may require stronger input protection, a larger jaw, data logging, low-current sensitivity, or compatibility with a formal calibration program.
| Selection criterion | Why it matters | Questions to ask |
|---|---|---|
| Current type | Determines whether the meter can examine the relevant AC, DC, or mixed signal | Does the application require AC, DC, or both? |
| Jaw size | Controls which conductors can be enclosed | Will the jaw fit the largest conductor without force or unsafe repositioning? |
| Waveform performance | Affects readings on electronic and switching loads | Does the specification address true-RMS behavior and frequency limits? |
| Safety category | Relates to transient exposure in the installation | Does the category match the point of measurement? |
| Low-current performance | Important for control circuits and small loads | What are the resolution, accuracy, and minimum useful reading? |
| Physical design | Affects access inside crowded panels | Can the jaw and selector be operated while wearing suitable PPE? |
| Support | Influences reliability and compliance | Are manuals, replacement leads, calibration, and warranty service available? |
Additional considerations may include display visibility, backlighting, hold functions, maximum and minimum capture, auto power-off, audible alerts, jaw movement, selector feel, and suitability for one-handed operation. Convenience features are valuable only when they do not encourage the user to work beyond the meter’s safe limits or to overlook the actual circuit condition.
A sound measurement begins before the meter is switched on. The following conditions should be satisfied whenever applicable:
If any of these requirements cannot be met, testing should pause until the issue is resolved or an approved alternative method is selected. A clamp meter’s convenience does not eliminate the need for isolation, lockout procedures, barriers, or a qualified second person where site rules require them.
When a reading appears abnormal, avoid immediately replacing a component. A structured workflow is more reliable.
Ask what changed and under what operating condition. Was the equipment recently repaired, overloaded, rewired, or exposed to moisture? Does the issue occur continuously or only during startup?
Check battery status, lead condition, selector position, and display symbols. Test the instrument on a known, appropriate reference where the site procedure permits. Do not use an unknown circuit as a casual meter check.
For clamp current, verify that only the intended conductor is enclosed and that the jaw is fully closed. Look for nearby conductors that may influence a low-current reading.
Measure at the same point, with the same load state, and after allowing the display to stabilize. Record whether the equipment is idle, starting, loaded, cycling, or controlled by a variable-speed drive.
Use a second approved method only when it is safe and technically suitable. A lead-based current measurement may not be appropriate merely because a clamp reading is inconvenient. The alternative must have adequate ratings and be applied by a competent person.
Compare the reading with nameplate data, design documents, manufacturer limits, previous records, and related measurements. A current imbalance, for example, may arise from supply conditions, winding problems, mechanical load, connection resistance, or measurement position.
Temperature, humidity, dust, vibration, electromagnetic interference, and limited access can affect electrical testing. Industrial sites often contain strong fields from drives, transformers, welders, and high-current busbars. The Extech EX900 should be used only within its specified operating environment. If the manual provides restrictions concerning condensation, altitude, pollution, or storage, those requirements should be observed.
In a crowded panel, the top measurement point may not be the very obvious one. A technician should prioritize safe access and a clear conductor path rather than forcing the jaw into a confined area. If the conductor cannot be safely isolated from neighboring conductors for a clamp reading, another measurement arrangement may be necessary.
Work organization also matters. Use a written measurement plan for complex systems. Label the circuit, identify the conductor, note the meter mode, and record the result immediately. This reduces the risk of confusing phases or attributing a reading to the wrong load.
Low temperatures can reduce battery performance, while high temperatures may affect the instrument and the equipment being tested. Condensation is particularly important when moving a meter between environments. The instrument should be allowed to reach a suitable operating condition before critical measurements are made.
From an industry perspective, the principal strength of the Extech EX900 is the combination of clamp-based current measurement and broader diagnostic functionality in one handheld instrument. That combination can reduce the number of tools required for routine service work and make it easier to move from a current observation to a voltage, resistance, or continuity check when conditions permit.
Its limitations are the same limitations that apply to multifunction meters generally. A broad function list does not guarantee laboratory-level performance in every mode. Clamp current readings depend on conductor arrangement and magnetic conditions. Electronic loads may challenge instruments with limited waveform response. Accessory quality affects safe use. Finally, the instrument cannot replace specialized equipment such as insulation resistance testers, power-quality analyzers, thermal cameras, vibration meters, or certified high-voltage test systems when those tools are required.
The defensible purchasing decision is therefore application-based. The EX900 may be a practical fit for routine electrical maintenance when its documented ratings, functions, and jaw capacity match the work. A more specialized instrument may be preferable for high-energy distribution, very low-current diagnostics, detailed waveform analysis, insulation testing, or formal power-quality investigations.
Professional measurement is more valuable when it can be reproduced. A useful record should include the equipment identification, circuit or phase, measurement point, date, time, operator, Extech EX900 or other instrument identification, selected mode, displayed value, unit, operating condition, and any unusual observations.
For preventive maintenance, trend records should use comparable conditions whenever possible. A pump current measured at maximum flow is not directly comparable with the same pump measured at minimum flow. Likewise, a motor reading during startup should not be filed as its normal running current.
Digital records can include photographs of the equipment and conductor position, provided that photography is permitted by site policy and does not create an electrical or security risk. Clear records help maintenance teams distinguish a developing equipment problem from a change in operating conditions.
When a reading leads to corrective action, retain the original measurement as well as the post-repair measurement. The comparison can show whether the intervention addressed the suspected issue. It can also expose situations in which a repair changed the symptom without correcting the underlying cause.
The Extech EX900 is used for electrical measurement and troubleshooting, with clamp-based current measurement as its defining capability. Depending on the exact version and documentation, it may also support voltage, resistance, continuity, diode, capacitance, frequency, temperature, or related functions. Always confirm the available functions on the specific instrument.
Clamp measurement is designed to measure current without opening the conductor. The jaw must surround the correct conductor, and the conductor arrangement must be suitable. Enclosing both outgoing and returning conductors can cause cancellation and an incorrect result.
For a conventional circuit-current measurement, one current-carrying conductor should normally be inside the jaw. A cable containing both supply and return paths may produce a low or misleading value because the magnetic fields can oppose one another.
Suitability depends on the panel’s voltage, transient environment, available access, conductor size, current level, and the meter’s documented measurement category. Review the instrument markings and manual before using it in an industrial panel. Site safety procedures may require additional controls or specialized equipment.
It can be useful for checking motor operating current when the circuit and instrument ratings are appropriate. Motor diagnosis should not rely on current alone. Compare readings under known operating conditions and consider voltage, mechanical loading, temperature, protection history, and manufacturer data.
Some clamp meters include a dedicated inrush or peak-related function, but the availability and performance of that function must be verified for the specific Extech EX900 version. Starting-current results depend on capture timing, load behavior, range, and circuit conditions.
No. True-RMS measurement can improve the interpretation of many non-sinusoidal signals, but accuracy remains dependent on frequency range, crest factor, bandwidth, signal amplitude, and the instrument’s published conditions. Variable-speed drives and switching supplies should be measured according to the manufacturer’s guidance.
Resistance testing should be performed on an isolated, de-energized circuit. Stored energy, parallel paths, and connected components can damage the meter or produce an incorrect reading. Follow the site’s isolation and discharge procedure first.
Inspect the housing, jaw, leads, probes, selector, and display. Confirm the correct terminals and function. Where permitted by the safety procedure, verify operation on a known suitable source before and after the measurement. A damaged or suspect instrument should be removed from service.
There is no universally correct interval for every user. The schedule should reflect usage frequency, environmental exposure, required measurement confidence, organizational policy, and any applicable quality system. Calibration or verification should also be considered after a drop, overload, contamination event, or other suspected damage.
Review whether the package includes test leads, a temperature probe, batteries, a storage case, and printed or digital documentation. The exact contents can vary by seller and region. Confirm that replacement accessories have appropriate ratings and are compatible with the instrument.
Not necessarily. Compare the total purchase value, including warranty, authenticity, package contents, return conditions, regional support, calibration access, and delivery terms. A dependable supplier can be important when the instrument is part of a maintenance or compliance program.
No. Ordinary resistance measurement uses a relatively low test voltage and is not equivalent to insulation-resistance testing. Insulation faults can remain undetected when tested with a basic resistance function. Use a properly rated insulation tester when the equipment procedure or diagnostic objective requires one.
Only if the jaw physically accommodates the busbar and the installation allows safe access. The conductor must not force the jaw open, prevent complete closure, or place the instrument outside its rated environment. In many high-energy installations, a specialized current transformer or permanently installed monitoring point may be safer.
The Extech EX900 can be a practical component of an electrical maintenance toolkit when its documented capabilities align with the task. Its clamp format supports non-invasive current checks, while its multifunction design may help technicians move efficiently through routine diagnostic steps. The quality of the result, however, depends as much on conductor placement, mode selection, safety category, waveform, environmental conditions, and operator competence as on the instrument itself.
Prospective buyers should verify the current specification, package contents, supplier support, and warranty for the exact unit offered. Users should treat every measurement as part of a controlled process: define the question, assess the hazard, confirm the instrument, take the reading correctly, and interpret it with equipment data and operating context. Used in that disciplined manner, the Extech EX900 can provide useful field information without encouraging overconfidence in a single measurement.
Striking the Perfect Balance: Navigating Premiums and Out-of-Pocket Expenses in Senior Insurance Plans

Explore the Tranquil Bliss of Idyllic Rural Retreats

How to Make Lasting Memories at Disneyland Attractions

Affordable Phones and Plans for Seniors

Affordable Full Mouth Dental Implants Near You

Unlock the Top Kept Secrets to Finding Your Ideal Dentist for Flawless Dental Implant Results!

Discovering Springdale Estates

Unveiling RS Sul Telecom Services

The Guide to Car Trading


Understanding Proportional Valves
Proportional valves are hydraulic components vital for controlling fluid flow and pressure with high precision in various industrial applications. Their importance in automation and manufacturing settings stems from their ability to offer variable output in response to input signals, greatly enhancing system efficiency and performance.
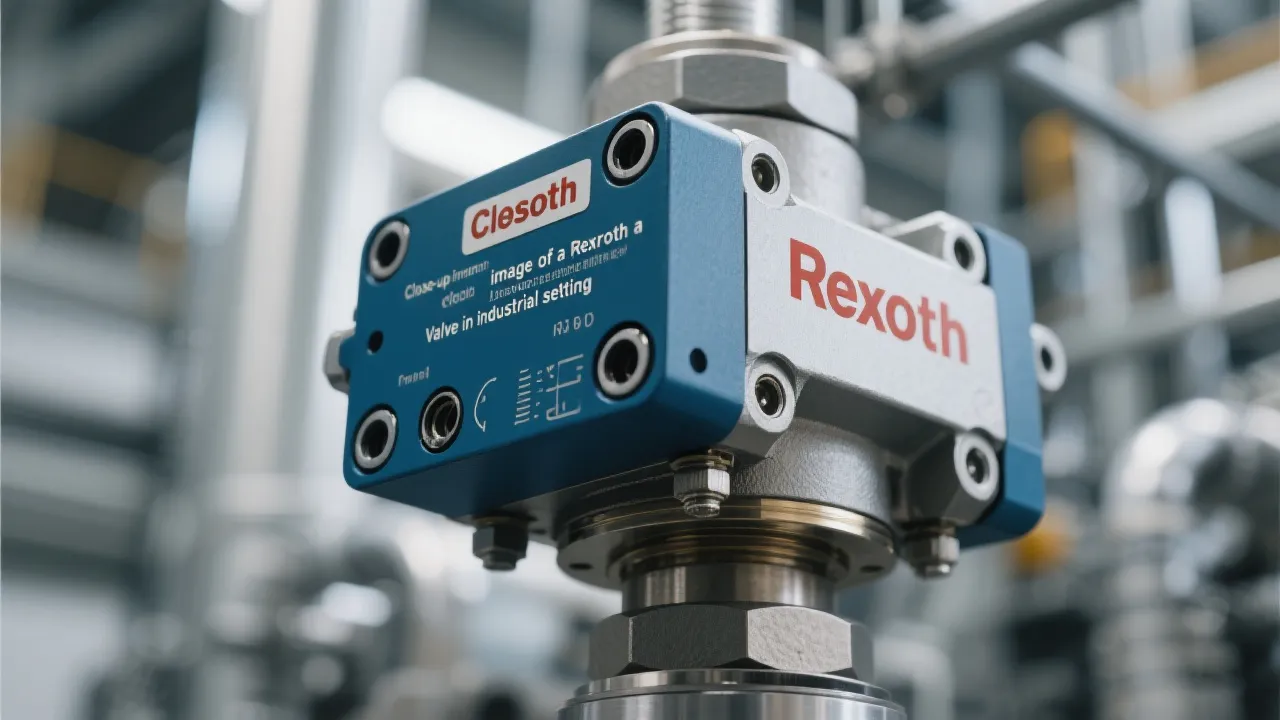
Understanding Rexroth Valve Systems
Rexroth Valves are quintessential components in various industrial applications, known for their precision and reliability. These hydraulic, pneumatic, and electrohydraulic valves regulate fluid flow in machinery, ensuring optimal performance and safety. Understanding their functionality and benefits is crucial for industries seeking efficiency and sustainability in their operations.

Unveiling Thermo Fisher Chromatography
This article explores the pivotal role of Thermo Fisher Chromatography in modern analytical science. Chromatography is crucial for separating compounds within mixtures, making it indispensable in industries such as pharmaceuticals and environmental testing. Thermo Fisher Scientific stands out in this field for its innovative solutions, leading to improved accuracy and efficiency in research and development.

Understanding Corrosion Inhibitor Manufacturers
In today's industrial landscape, corrosion inhibitor manufacturers play a crucial role in safeguarding equipment and infrastructure against corrosive damage. These manufacturers provide specialized chemicals that prevent corrosion in various environments, including industries such as oil and gas, marine, and construction. Understanding their operations and offerings is essential for selecting the right supplier and maintaining asset longevity.
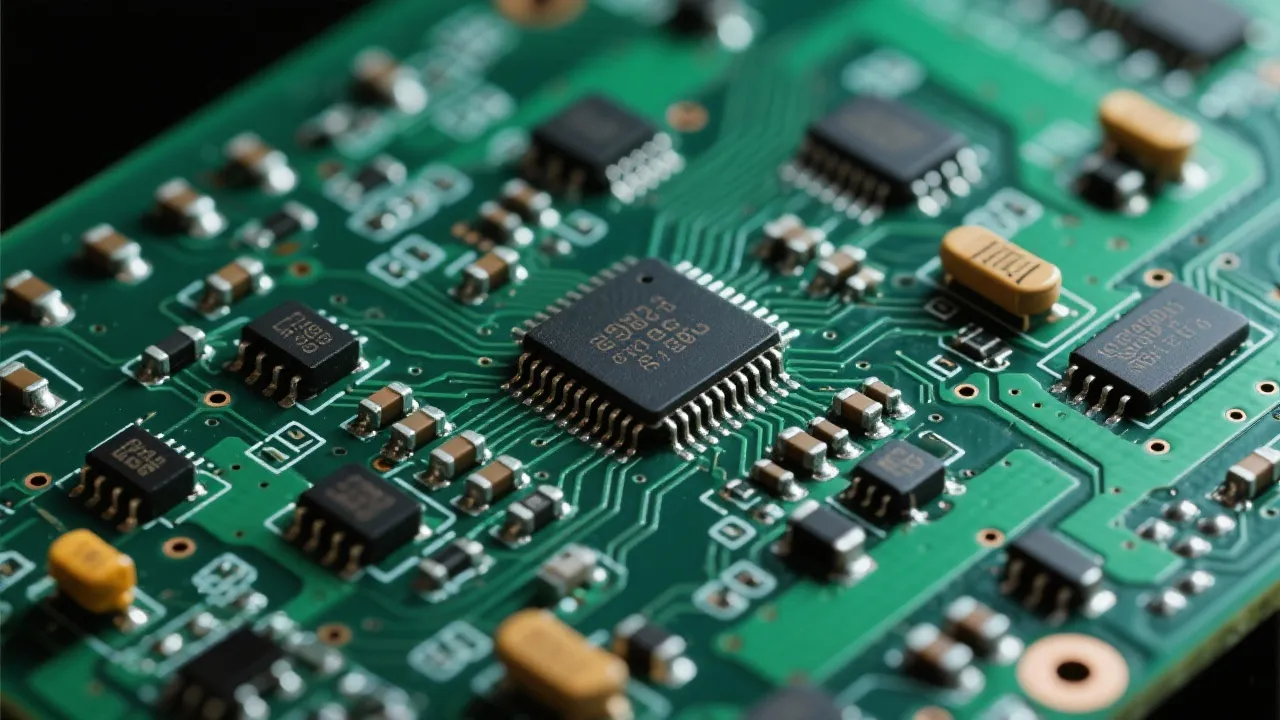
Analyzing Lm66100 Digikey Components
This article offers an in-depth analysis of the Lm66100 component available through Digikey, a renowned distributor of electronic components. The Lm66100, a load switch, is integral in industry applications, providing efficient power management. This piece explores its features, applications, and availability through Digikey, while offering a comprehensive guide for industry professionals seeking to optimize their electronic designs.

Leading Corrosion Inhibitor Suppliers
Corrosion inhibitor manufacturers play a crucial role in protecting materials from degradation. These companies specialize in creating chemical compounds that slow down or prevent the corrosive effects on various surfaces, especially metals. Understanding their production processes and solutions offered is vital for industries reliant on metal infrastructure.